
Mark Bittman said in his second blog on the topic that you can't follow the "traditional" version when you're using whole wheat. I completely disagree. This is how my whole wheat no knead bread looks like:

In my book that's a fine looking bread. Especially since this one was baked at 6,000 feet, where I had problems with all of Peter Reinhart's recipes.
And the best thing is - it's super easy to make. There is a drawback - the bread doesn't age quite as well as a properly kneaded bread, but that is just a great excuse to eat more bread! While I often use spelt, and wheat and rye in differing proportions my mainstay bread is mostly white whole wheat and a bit of rye to make it moister.
Start with 2.5 cups of white whole wheat (I haven't bought regular whole wheat since I discovered white whole wheat. It's much less gritty, and has a great flavor to it), 0.5 cups rye (I have a very coarse rye ground which I like better than the fine ground rye, but it doesn't really make a difference), shy of 1/2 teaspoon instant yeast, 2 teaspoons salt, 0.5 cups seeds or walnuts, and 1.5 to 2 cups cold water. Mix everything together for a minute or two, and adjust the water. You want a wet to sticky dough that's easy to manipulate with a cooking spoon, but not a liquid mess. When you're done shape a round ball in the middle of the bowl, and put everything in the fridge. In a pinch you can just let it rise, but the taste improves dramatically when the dough gets a slow fermentation at least overnight, up to a few days. Yes, it requires planning ahead. Doesn't all baking?


In this case, the dough spent 3 nights in the fridge. When you're ready to bake pull it out and let it come to room temperature. It should have about doubled. Ok, this one probably tripled rather than doubled. Nothing to worry about. Perhaps they should call it the "no worry bread"?

Now the only tricky part of the whole business starts - shaping. Carefully empty your bowl onto a well floured surface. You don't want to deflate it too much. Then shape it - it's a fancy name for basically just folding it over like you would a letter, in thirds, one from each side. Then do it again from the other side. It helps with surface tension of the dough and makes the bread rise like you want a bread to rise, in a nice boule, not flat like a cake, and to give you a nice, artisan looking crust.


Especially when the dough is very wet it helps to use the bench scraper for the shaping. Then the dough then rests some more, ideally an hour. I like to put mine an a banneton for the looks, but any well floured bowl will do. Put it in with the seam on the top, since that'll be the bottom of the bread.
While the dough is going through its final fermentation prepared the oven. The no knead bread gets baked in a Dutch oven. I find this method so good that I bake all my breads that have a wet dough like this - it saves you to add moisture to the oven and gives you an outstanding crust. For the 3 cup bread I either use a 2.25 quart Staub cocotte, or my Grandmother's oblong dutch oven.
Put the empty, unoiled Dutch oven with the lid in the oven and preheat to 500F or as far as your oven will go. Once it reaches the temperature wait another 15 minutes. Then take the Dutch oven out (be very very careful - 500F!), take the lid off, pour your bread dough in, and slash the surface. After experimenting with knives and razor blades I find that scissors work the best. Put the lid back on, stick the Dutch oven in the oven, lower the temperature to 475 or 450, and set a timer to 30 minutes.


At 6,000 feet, and in the oblong pan I bake it for another 30 minutes, in the round pan probably another 40 minutes. At 1,500 feet I only bake it another 20 minutes. It's also a function of what temperature your dough had when you put it in. Since I don't have a bakery, and am not always able to time things perfectly there is quite a bit of variation in it. However, there is a sure way to tell that your bread is done: The internal temperature needs to be at 210 to 220 F.
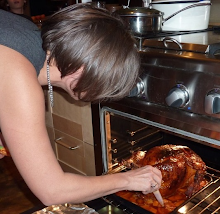
Once you take the bread out withstand the temptation to eat it right away: It needs to cool at least an hour. And this is how mine looked today:

Made for a glorious breakfast, with one of my 100 dozen eggs :-)
Whole Wheat No-Knead Bread
2.5 cups white whole wheat flour
0.5 cups rye
shy of 1/2 teaspoon instant yeast
0.5 cups seeds or walnuts
2 teaspoons salt
1.5 to 2 cups of water
Mix all ingredients into a sticky dough, let rest in the fridge at least overnight.
Let come back to room temperature, then shape, and bake per instructions above.
My favorite variation is to use black olives and chopped rosemary instead of the seeds. But the sky is the limit - go and play with it and let me know what your favorites are!


Gorgeous bread, Silke! It looks so rustic.
ReplyDeleteI will be trying it this weekend. Already write down white whole wheat and rye on my shopping list :). I won't be baking it on a dutch oven though. I have a Le Crueset 3 qt one but the lid had the funny black knob that can only stand up to 350 degrees (how lame is that). Maybe I should remove the knob :). I'll let you know how the bread turns out. Thanks for the recipe.
After I killed the knob on the Le Creuset (nothing bad happens, it just rips apart) I went to Sur La Table to complain and they had a metal knob. Well worth the investment. Here it is: http://www.surlatable.com/product/le+creuset+stainless+steel+knob.do
ReplyDeleteIt really makes all the difference in the world to bake it in the Dutch oven. I'm afraid my dough is usually so limp that it would look like a ciabatta if I baked it free. Also, the not having to mess with moisture in the oven makes a difference. To me at least :-)
This is really helpful. Never thought there's a knob replacement. I've been meaning to check out Sur La Table store, this is a good excuse for me to go there.
ReplyDeleteI tried Rose's ciabatta's once. It was really soft and I couldn't even shape it (sticks everywhere), let alone bake it. I ended up adding a lot of flour and baked it. It ended up being quite dense. We still eat it, but I've been afraid to revisit it since.
(My last comment disappeared into cyberspace... hmmmm)
ReplyDeleteThis dough is super sticky as well. That's why very little shaping and a lot of flour and using the bench scraper is your friend. It really is only a flap over from the left, one from the right, one from the top and one from the bottom, and then I'm done. And lots of flour in the banneton as well, otherwise it sticks to it....
You can do it! I know it!
Silke, am planning on making this bread next week. I already got the white whole wheat flour and rye, but want to go to sur la table to get the replacement knob. Will keep you posted :).
ReplyDeleteGood luck Jenn, let me know how it turns out!
ReplyDeleteSilke,
ReplyDeleteSo I did try to make your bread. I split it into 2 and well, they didn't turn out. I proof my yeast and they seem fine, but the bread didn't rise at all. I have one of those instant yeast in a jar, always use it and it's usually ok. I really do think the yeast are the cause because the danish pastries didn't rise as much as the one from last week. I still baked the bread and they turn out hard and not edible. For me at least, hubby (bless him!) still eat it - I don't know how he can chew it because it's pretty hard.
Anyway, sorry for the long message. I will still try again next week (with a new jar of yeast). Will let you know how it goes :).
Oh oh. It could also be that the dough was too stiff? It's hard to see, but my dough is very very sticky. Also, did you let it come to room temp after you took it out of the fridge, before the shaping? Mine turn out harder when I am rushed and don't let everything rise properly after the delayed fermentation.
ReplyDeleteOtherwise you'll have to come by for a breadmaking class :-)
I'll get countertops tomorrow, so I'll take some more pics then...
I made 1/2 loaf twice actually. One was on Saturday, and I left it in the fridge overnight. I did let it come to room temperature for a couple of hours. The other 1/2 I made Sunday morning - let it rise for a couple of hours as well. They both have the same size even after 4 hours.
ReplyDeleteIt might be because of the stickiness. My dough is only a little sticky.
So yours is sticky in a way that if you touch it, part of the dough will stick on your fingers?
Seriously, I might do have to come for a bread class. It's not supposed to be this hard but I fail more than succeed when I make bread, :(.
Mine is super sticky. If I touch it with unfloured fingers I'll have dough on my fingers. The only way I can fold is is with the bench scraper. And once it's folded I can barely handle it, and only with a lot of flour. I often inadvertently fold it again, just because it flops out from under my hands. It's very easy to stir with a cooking spoon. If I turn the bowl it'll start flowing out. Not fast, but it will definitely move.
ReplyDeleteDo you ever make it out here? You're very welcome!
Hm so my dough is not wet enough for sure. Thanks for the description! It'll definitely help when I make it again.
ReplyDeleteI do visit the bay area sometimes - have some friends there. I'll let you know when I do and hopefully we can get together. Baking session yay! :)
Deal! Looking forward to it! They are putting the countertops on, so I have hope that I have a functioning kitchen by then!
ReplyDelete